Showing posts with label quiltblocks. Show all posts

Thursday, May 15, 2025

Splish Splash Friends - Island Batik Ambassador Irish Chain Challenge


The Island Batik Ambassador Challenge for the month of May was to create an Irish Chain quilt using the Accuquilt Go cutter and Irish Chain Die.  This die can cut all of the components for a complete block in one pass. Pretty Cool!  I had to do some additional cutting as I needed more squares for my double Irish chain alternate block but I cut 8 layers at a time which made it go quickly.  


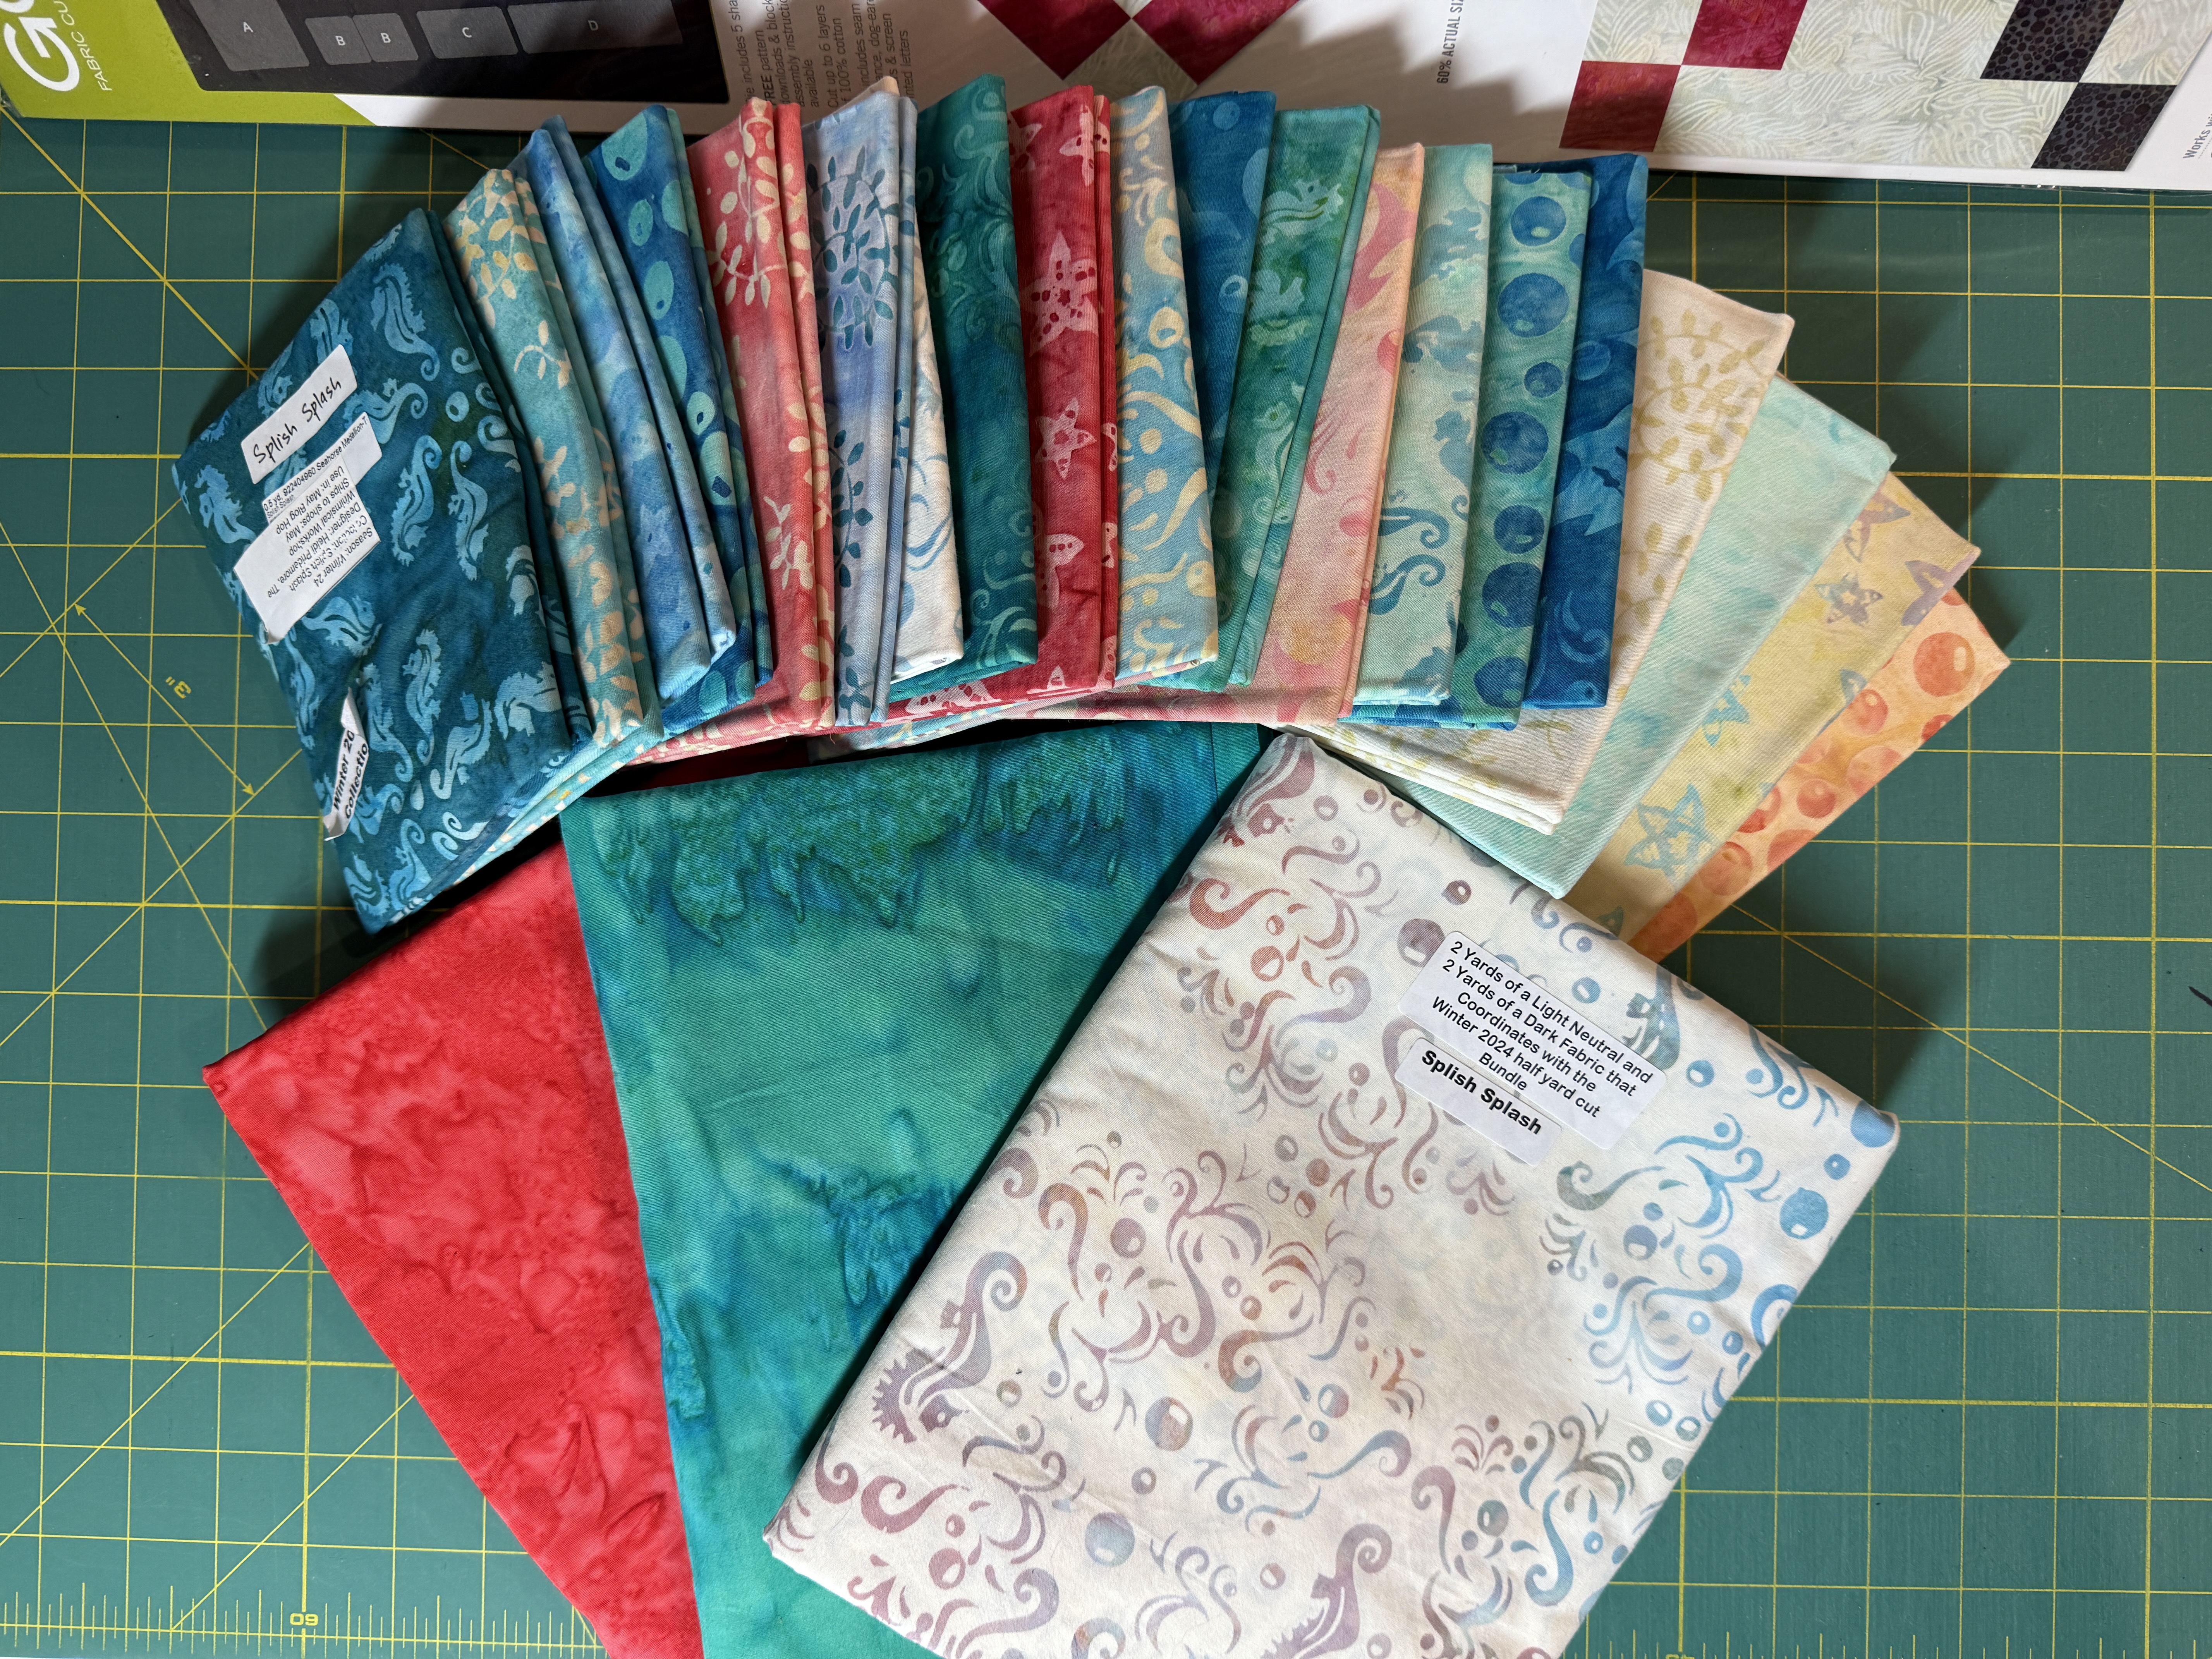
I decided to do the additional block as the Irish chain pattern really doesn't showcase fabric due to the small squares. Check out those sea horses on the white medallio background fabric. So stinkin' cute!


Splish Splash is absolutely adorable fabric!  It is covered with sea horses, fish, kelp, bubbles and starfish. The colors are rich shades of teal, blue and coral. Certainly some of my favorites!  I have some leftover fabric, so I will certainly make another quilt in a different design to showcase some of the cute creatures.

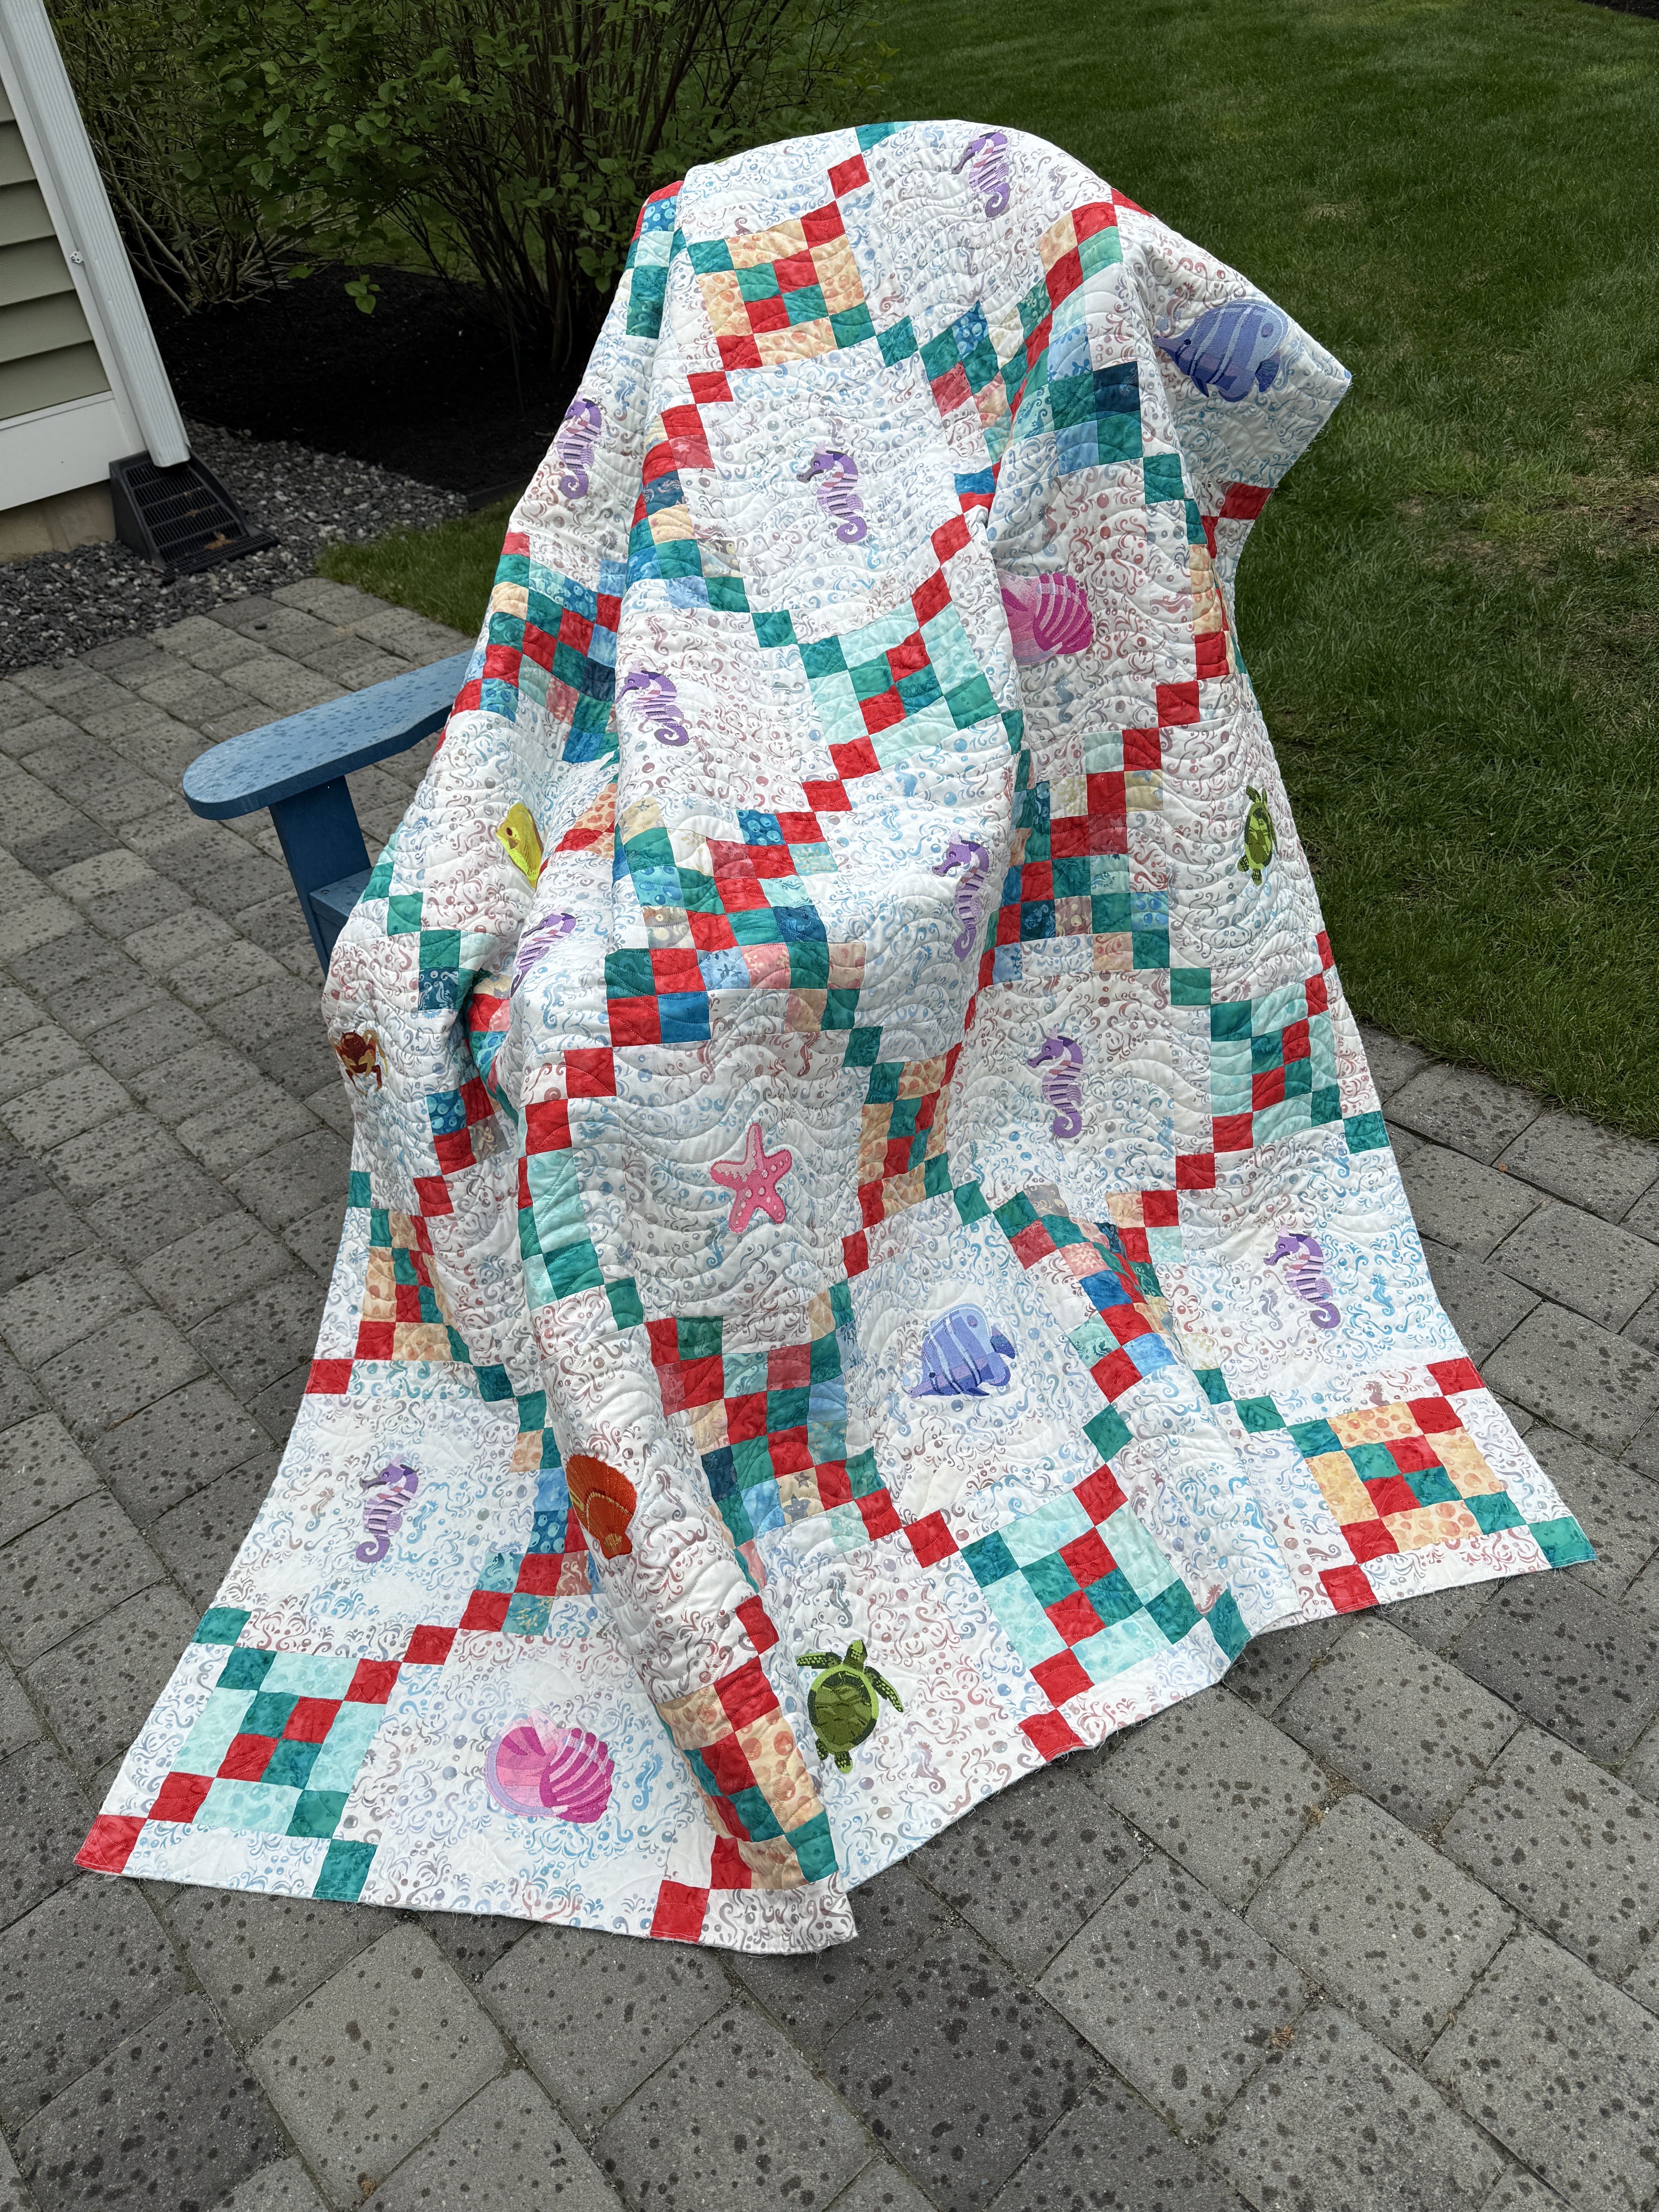
I loved the idea of embroidering some seahorses on the quilt to keep in theme with the fabrics. I found a free vector file online with some cute sea animals so I digitized them in my Bernina Designer 9 software and embroidered the individual blocks on my Bernina 770 QE Plus machine using OESD Isacord threads. 31 blocks in all are embroidered. Each sea animal is approximately 5" x 5".  What was I thinking?  Took 4 days and a lot of thread!


The piecing took a bit of time as I was dealing with individual squares versus stripsets to create the block components. I also ran into a few glitches. I ran out of background fabric. I designed the quilt in Electric Quilt and went by their fabric calculator then added 3/4 yard on the background fabric for trimming etc. I was short 1 strip!  I had very few scraps so I sewed a few together and cut the 4 pieces I needed from the seamed scraps. They are scattered in the quilt and you would really need to look for them so all is well. 

For my piecing, I used Schmetz 70/10 Microteck sharps on my Bernina 770 and a tight stitch length. I love working with batiks as they do not distort or have a ton of bias and the shorter stitch length makes for a tight, smooth seam that doesn't stretch out when it is under tension on the quilters frame. I use Aurifil thread for all the piecing in my favorite Dove Grey 2600. I pressed as I sewed with my trusty Oliso iron right next to my machine. It helped make quick work of it. 


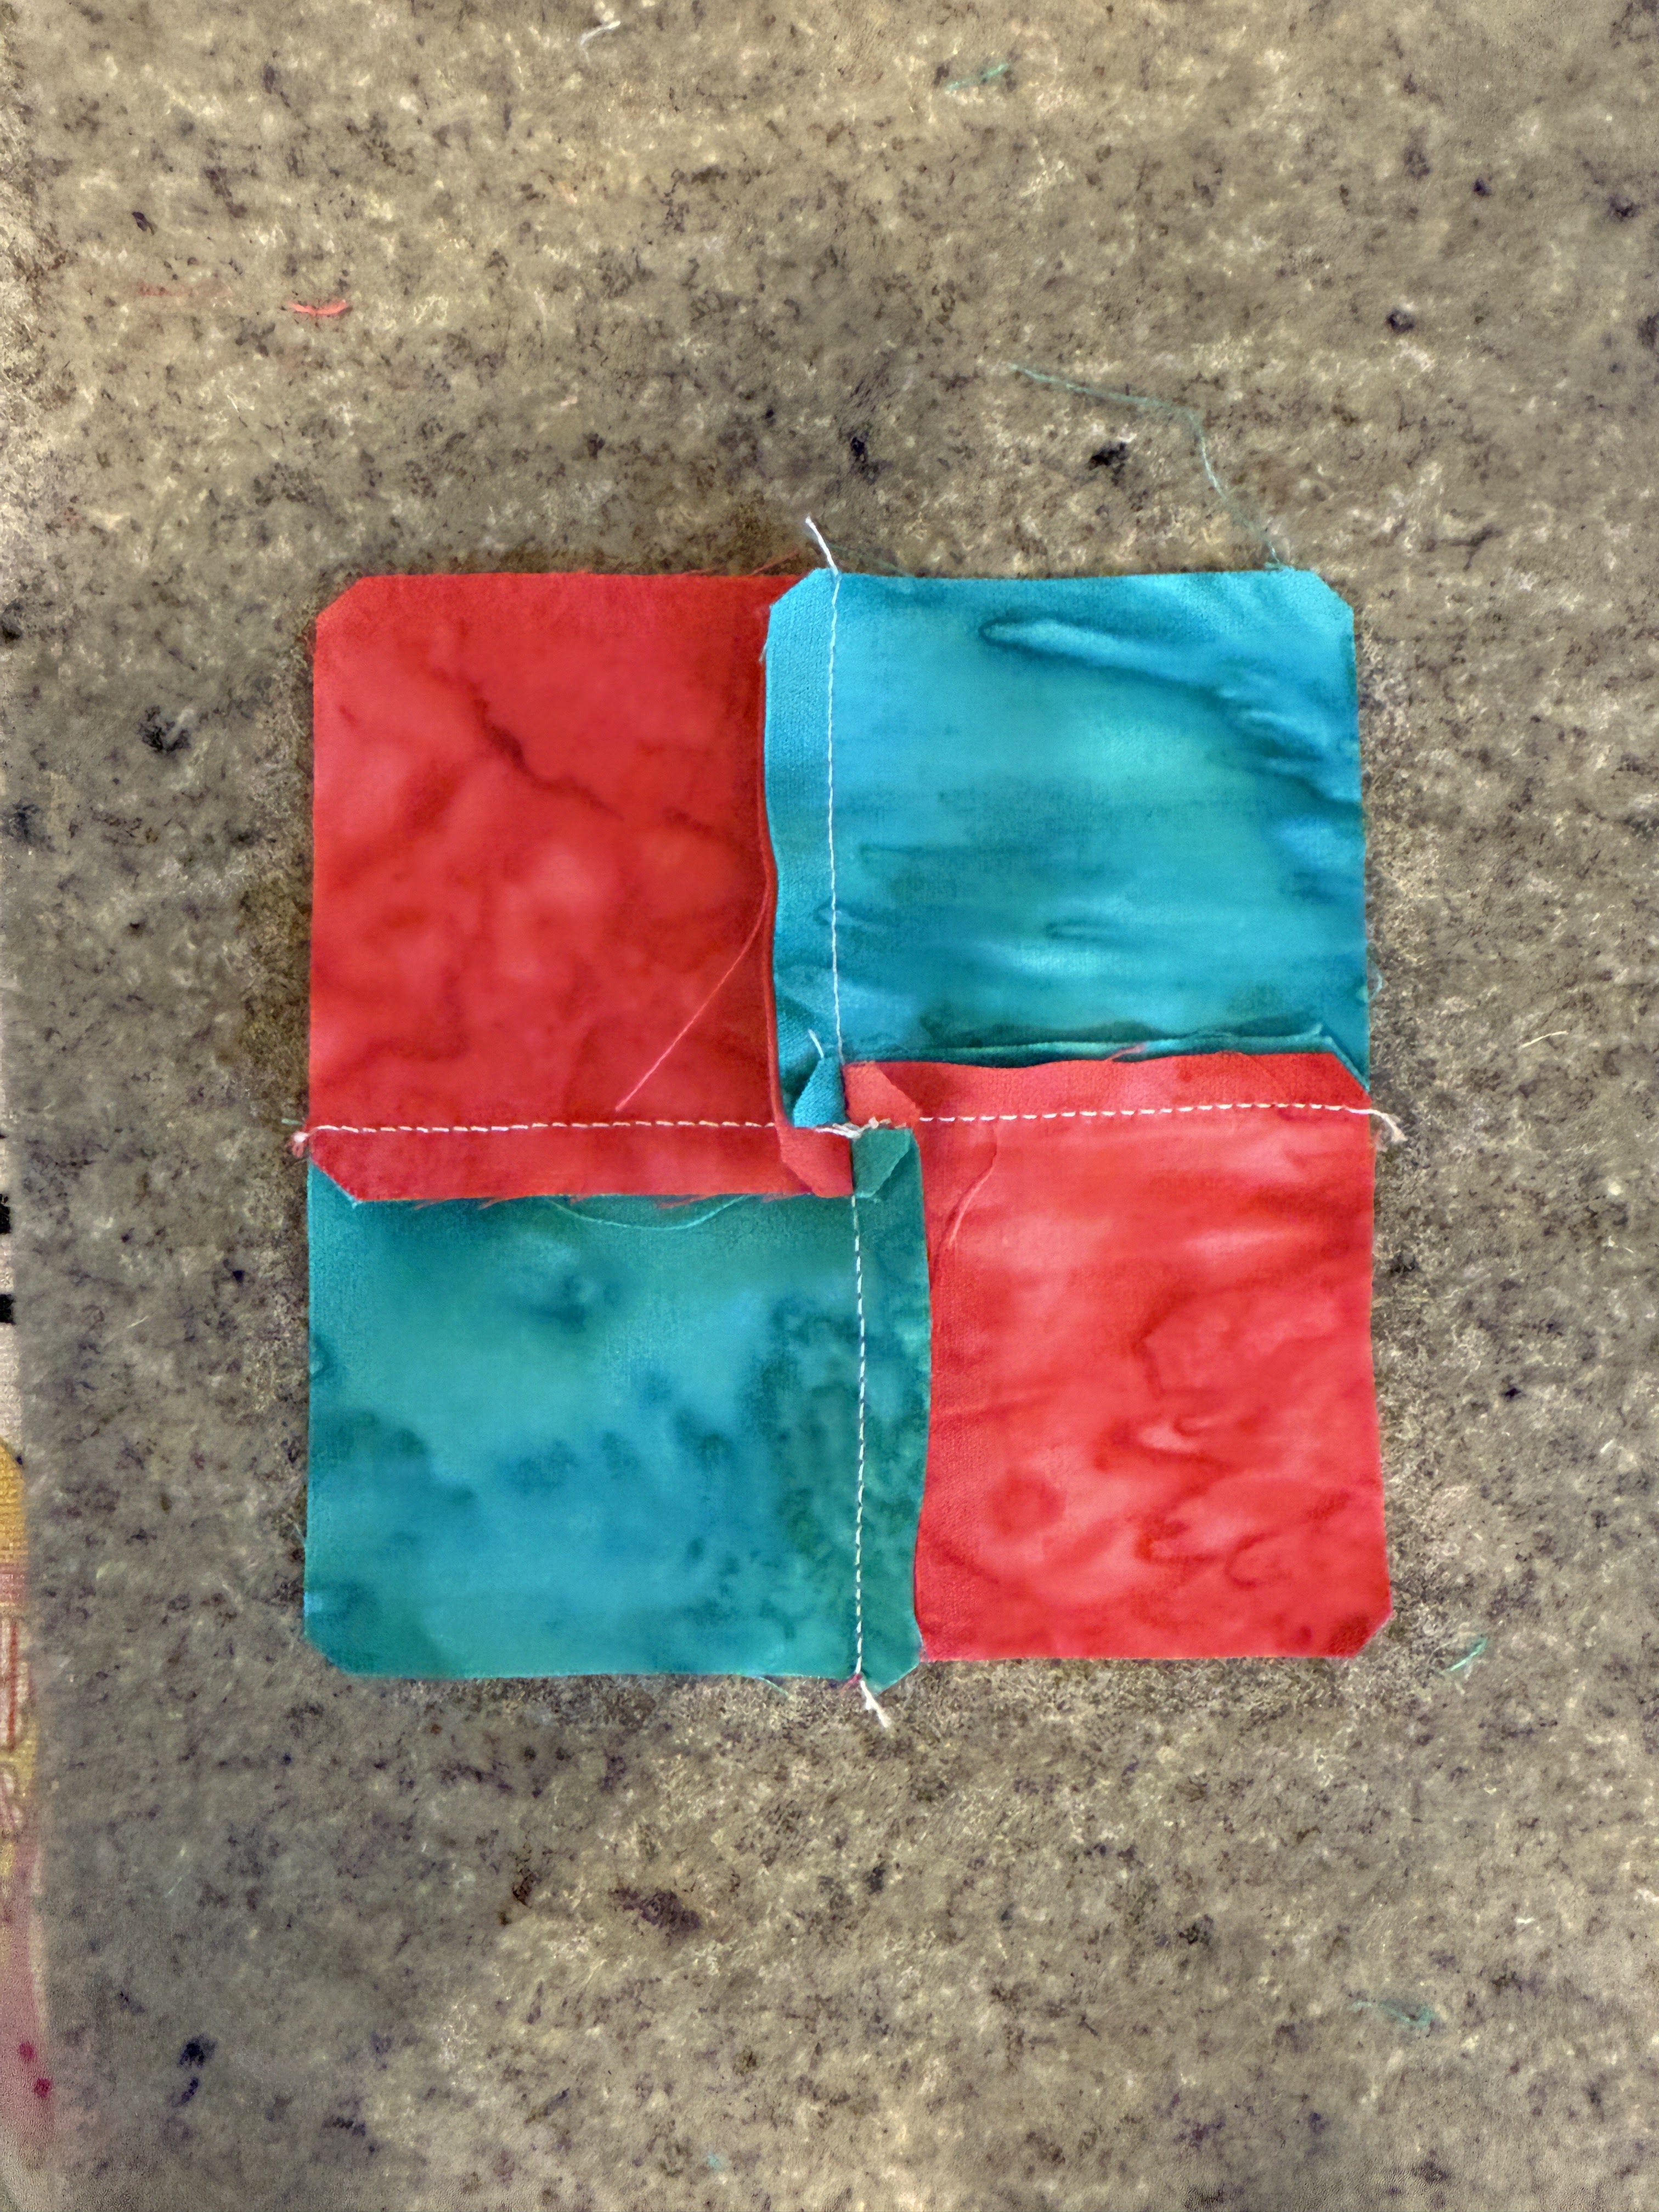
I did a lot of chain sewing. The way the Accuquilt Irish Chain die cuts the pieces, it leaves a smart corner on all four corners so easy to match up to sew.  


My final pressing was done on my Rowenta Steam Station and I used my quilters wood clapper to get all the seams very flat.  I also spun the center seams on all the block center four patches to keep them flat, My long armer loves my nice flat seams!

My quilt was long arm quilted by the awesome Dottiann Chevalier. She did really neat wave quilting across the blocks that actually went around all the embroidery, not over it. I used Hobbs Tuscany 100% cotton natural batting. I was worried that a natural might shade the background fabric but it was ok. 


So I hope you enjoy my little Irish Chain Quilt and all of the other beautiful quilts my fellow ambassadors are creating this month. Be sure to check out their blogs all month as there are new ones posted with fabulous new Island Batik collections every week. And, you will have a chance to win prizes!  Here re a few more pictures. Unfortuantely, it is raining so I couldn't get good shots outside and I have no wall space inside to hang it flat but I will add more.


You can win just by visiting the blogs and entering and you'll have another chance at the end of the month to vote for your favorite Irish Chain quilt and be entered for more prizes.  

Enter Here for the Blog Hop Contest


Thanks and Happy Spring!
Sue


Be sure to check out the wonderful designs the other ambassadors created for the challenge. So many unique approaches and viewpoints. I like them all so much it is difficult to choose a favorite!


Wednesday, March 26, 2025

Blossom - An Island Batik Challenge Quilt March 2025


As an Island Batik Ambassador, we receive monthly challenges to create original projects using beautiful Island Batik fabrics that are currently shipping to quilt shops.  I decided to use the same collection that I used for the February challenge, Petal Poetry, as I had not used all of the fabrics and I wanted to showcase them a little better. I originally made about 70 blocks which used all of the fabrics, but I was not happy with the layout. It was too cluttered. So I used about 33 here and I have enough to do another quilt which will look very different as the greens are more dominant in those blocks. This quilt has all the greens but features the purple and blue fabrics as the focus.


I decided to create a kaleidoscope block using one of the Studio 180 Design tech sheets for a cyclone block using the Tucker Trimmers. Love the Tucker Trimmers as you can square up or cut accurate segments on just about anything! Deb has some great videos as well as patterns for this technique on her website so check it out!


To start, I created strip sets which I then cut my wedges from using the Tucker Trimmer III.  My blocks finish at 8" so I used 2" strips for my strip sets.  It's important that your 1/4 inch seam is accurate when doing strip sets so that your wedges will all come out the same size and line up in the center. 


I used a seam guide to make sure my strips stayed nice and straight as I fed them through the machine. Of course Princess Luna was on hand to closely inspect the strips as I sewed them. Her inspection station is the top drawer in my sewing table with her special cat princess blanket which she does not allow her brother to use. A true princess! LOL


Once we passed inspection, it was time to move all the strip sets over to the ironing board.


Pressing is important. I usually align my strips with the edge of my felt pressing pad to make sure they are straight and do not distort or curve when pressed. As these blocks have a lot of seams and use 8 wedges which need to come to a perfect point in the center, I opted to press all seams open. I like to use these pressing sticks from the Strip Stick Company. I have them in different lengths. Very handy!

Next the segments were cut from the strips sets and the triangles cut, then trimmed into wedges.


I kept all my wedges together in groups of 8 (one block) and sewed pairs together. Really great thing about these blocks are that there are no matching seams when joining the wedges. How great is that! This part of the process actually went pretty quick!

I like to chain sew whenever possible so everything stays together and you save some time. Once the pairs were all sewn, they needed to have the seams pressed open. I like to use a wooden clapper and a felt mat and steam to make the seams as flat as possible.


When you are matching up the pairs and sewing them into the blocks, put a pin through the center intersections to line them up for perfect center points.

 Once the pairs were all sewn, they needed to get trimmed again using the Tucker Trimmer III. This insured a true 90 degree corner. Once all the pairs were trimmed, it was easy to go back and sew 2 sets of pairs together to create half the block, then sew the halves together to create the full block.  Once that was done, all seams were pressed open and they need one more trim on the Tucker Trimmer III.
Once that was complete, I added triangles on the corners then squared the blocks to 8 1/2"


I ended up make around 70 blocks as my original plan was to just join them together into rows but it just seemed to busy and cluttered when I had it up on the design wall so I changed the layout.  I really wanted it to be like a blossom with layers and some depth to the center so I used a fractured layout just in the center, splitting the blocks around the middle in half.

I like lots of negative space and I really felt that a border was not needed so I did a flanged binding with just a small peek of color to offset the quilt.  Here's a few pictures of the final!  


That's it for this week!  Be sure to check out the blogs for the other ambassadors. There were some really amazing projects created this month!  Until next time, happy sewing!

Best
Sue


Wednesday, August 4, 2021

 Half Square Triangle Fun

There are so many different ways to make a half square triangle. Tonight on my sampler group sew, we explored a couple of different ways and I thought it would be nice to post the cheater chart with the sizes to cut the square for 8 at a time. I have done the math for you up to 8" finished but if you need larger, the formula is there for your reference.  I always add a 'fudge factor' to my cut size. For example, we were sewing 2 1/2" half square triangles to finish at 2".  The chart tells me to cut a 5 3/4" square but I added 1/4" and cut two 6" squares.  This gave me a little wiggle room to trim to perfection in case my seams were not perfect.

Finished Block Size

Minimum Size of Squares To Cut:*

Trim Pieced Block To:

A

A x 2 + 1 ¾”

A + ½”

1”

3 ¾”

1 ½”

1 ½”

4 ¾”

2”

2”

5 ¾”

2 ½”

2 ½”

6 ¾”

3”

3”

7 ¾”

3 ½”

3 ½”

8 ¾”

4”

4”

9 ¾”

4 ½”

4 ½”

10 ¾”

5”

5”

11 ¾”

5 ½”

5 ½”

12 ¾”

6”

6”

13 ¾”

6 ½”

6 ½”

14 ¾”

7”

7”

15 ¾”

7 ½”

7 ½”

16 ¾”

8”

8”

17 ¾”

8 ½”

 *ADD ¼” to the cut size of the square to allow a little fudge factor for trimming to perfection!

Once you have cut the two contrasting squares, layer them right sides together.  Draw a line on the diagonals, corner to corner.  Your block should have an 'X' on it.  Sew 1/4" to either side of the lines.  (Sew lines are the Blue dotted lines on diagram)

Cut lines are the Solid Black lines on the diagram. When the sewing is completed, line up a ruler to cut vertically straight through the middle of the block.  Without moving the sections, now place the ruler horizontally through the center and cut.  Again without moving the sections, place your ruler on the diagonal line corner to corner and cut between your seam lines.  You now have 8 half square triangles. Tip:  If you have a spinning cutting mat, it will make the cutting easier.

Press open to the darker side.  Now square your triangles to perfection using the TRIM block dimension in the chart.  When sewn into the quilt, your block will be the Finished block dimension in the chart.  My favorite ruler for trimming is the BlocLoc ruler but any square ruler will work.  Just be sure you are lined up on the diagonal seam.


Happy Sewing!

Sue

PS.  Be sure to visit our web site for great patterns, rulers, tools and more!